
Written Tutorial with Photos for
Shadow Box Frame and Card
Youtube Video Tutorial
This is an image of the final project you will achieve.
It is really pretty and so versatile with what you can do with it.
So here goes
Get a sheet of cardstock or heavy weight paper and cut it down to 11" x 11"
Then we are going to score it on all 4 sides
score at 3/4" - 1 1/2" - 2 1/4" - 3"
Then on the top and the bottom score also at
3 3/4" & 7 1/4" but only score from the top to the 2nd score line (the 1 1/2")
then we start cutting out I have a picture below to show exactly what you are cutting out

You should then end up with the image below

Next we fold and burnish all our score lines

Then we start to construct our frame

Then construct your frame quickly without any adhesive as we are going to mark the area inside the frame we need our paper inside to cover.

Do a small mark on each of the 4 corners where they join so you end up with the panel looking like the image below. (I forgot to photograph the next step but you take a muted designer paper and cut it to 4" x 4" and glue it on to the base ensuring to cover the 4 pencil marks you have made as this makes sure that your base will be totally covered.

the picture below shows you where to add your glue or tape to

Here is a closer image

you will see that I have shaded in the triangle areas above the glue or tape line
these also need a little adhesive as these are the part that hold the frame down

We then roll the sides into themselves to create a pillar
the adhesive part will be on the base of the frame

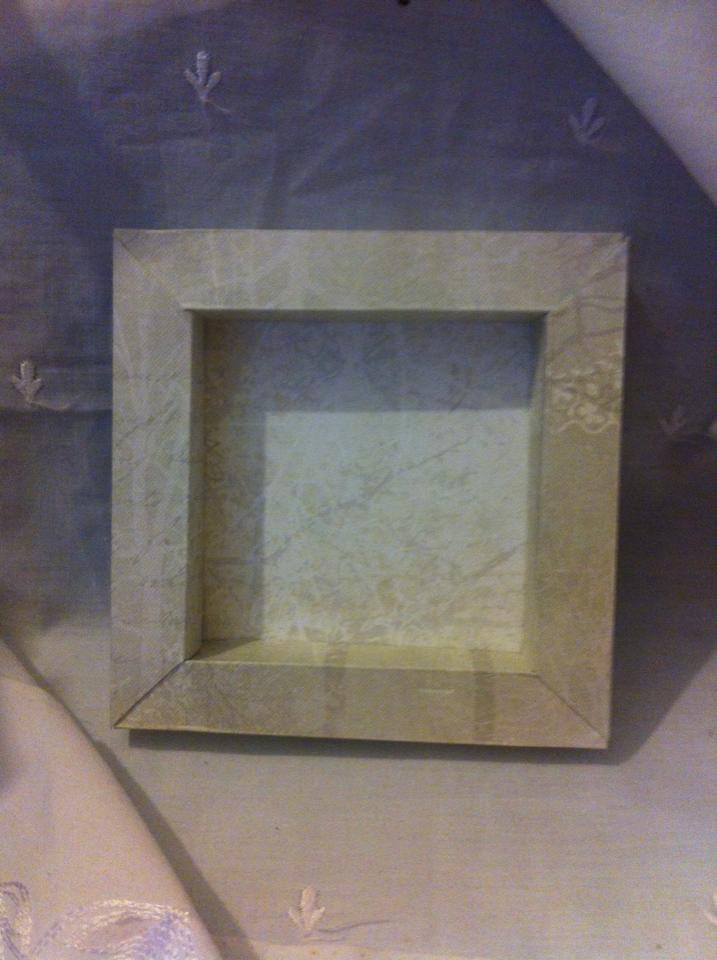
You will end up with the frame below it that is all you are wanting you are done, just decorate how you like. but if you want to make the frame into a card keep going

Next step is cut a piece of cardstock (I have used white 280gsm)
it needs to be 5" x 6"
then score this at 5" to create a small fold like below

then using adhesive attach the small fold to the back of your frame to give you a card

Then take a 1" x 5" strip of designer paper that you trimmed off (if you used a 12"x12" sheet to start with) and this is going to be glued on to the small white fold that is on the back of frame just to make it look neater

Like so much more professional finished look.

and now it is totally done all you need to do it decorate
I have got 2 now 3 including this one to decorate so when they are complete I will add them in to this post. I hope you have a go and enjoy it as they are superb and once you have the basics done and in your head they are so simple to make x
Enjoy and Happy Crafting xx
No comments:
Post a Comment